Quirky Jo’s Gluten Free Artisan Bread

Those of you who follow other Thermomix blogs out in the blogosphere may very well be familiar with the amazingly delicious and healthy recipes to be found on Jo Whitton’s Quirky Cooking blog. Jo specialises in creating recipes for people with various allergies and food intolerances – gluten free, dairy free, sugar free recipes for instance. With the help of Thermomix, Jo makes it possible for people to eat well and cook with joy, whatever their nutritional requirements. There’s a sprinkling of humour in her blog, along with a good dose of Australian family life. But most of all, there are hundreds of creative recipes that are good for you – and taste really good, too!
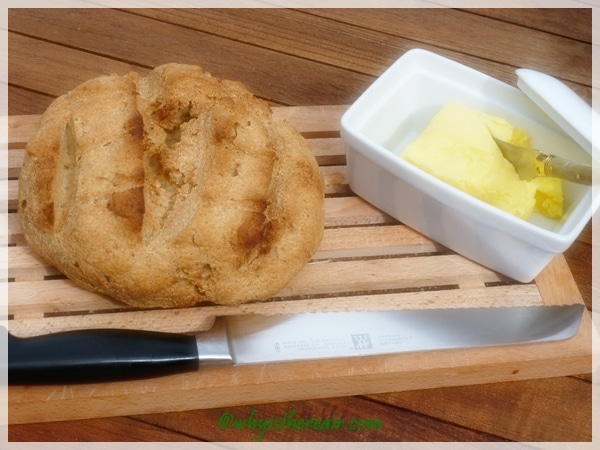
By choice, I’ve recently started reducing the amount of gluten I eat, and Jo’s Thermomix recipe for Gluten Free Artisan Bread is a delicious way to eat bread, gluten or not! Any Thermomix gluten free bread is easy to make, very economical and infinitely tastier compared to store-bought versions. The following recipe yields the closest I’ve seen to bread made from wheat flour. It’s very, very tasty, it’s flexible and bendy, and because you make a big batch that you keep in the fridge, you can make any number of individual loaves, bread rolls, baguettes or larger loaves, according to your needs and your fancy.

Quirky Jo’s Gluten Free Artisan Bread
This recipe makes four 500g loaves – the dough stays in the fridge and you just bake a loaf when you need it. Many thanks to Jo Whitton and Quirky Cooking for this brilliant recipe, which I have reproduced here.
Ingredients
300 g brown rice, divided 150 g and 150 g (or use brown rice flour)
220 g sorghum flour (find in health food shops, online or in Indian/Asian grocery stores – also called ‘Juwar Atta’ flour)
380 g tapioca starch (tapioca flour)
2 Tablespoons instant yeast
1 Tablespoon fine sea salt/Himalayan salt (adjust to taste)
2 Tablespoons Xanthan gum
4 large eggs
670 g lukewarm water
65 g neutral flavoured oil (e.g. macadamia, grapeseed, sunflower, light olive)
30 g honey

Method
- Weigh 150 g brown rice into TM bowl and grind 1 minute/Speed 9. Tip out and reserve. Repeat with other 150 g brown rice, 1 minute/Speed 9. Add the first batch of ground brown rice back into the TM bowl.
- Add the remaining dry ingredients and mix in on speed 5 until well combined. Tip flour mixture into a large mixing bowl.
- Weigh or add eggs, water, oil and honey into Thermomix and mix on speed 4 until combined, about 20 seconds.
- Pour liquid into the bowl with the flour mixture and mix together with a wooden spoon until all the dry ingredients are well incorporated. There is no need to knead! Dough will be like a wet, sticky, scone dough, not like a regular bread dough.
- Cover loosely (but not airtight) and allow dough to rest at room temperature until it rises, approximately 2 hours or so. You can use it immediately after this initial rise, but the flavour is nicer if you refrigerate it in a lidded (not airtight) container overnight first. You can use the dough over the next 7 days, although bear in mind, the flavour gets stronger each day.
- When you’re ready to bake it, wet your hands, and take out a grapefruit-sized piece of the refrigerated dough. Quickly shape it into a ball, gently pressing into shape, and smoothing with a little water if you don’t want it rough and rustic.
- Allow the dough to rest, loosely covered in cling film on baking parchment on a baking tray. It will need to rest for about an hour and a half, or even 2 hours. (If it hasn’t been refrigerated and you’re using it straight away, it will only need about 40 minutes to rest.) It will rise a little in this time, but it won’t double like regular bread dough does.
- Thirty minutes before baking, preheat the oven to 230° C/450° F, with a baking stone placed on the middle rack. (If you don’t have a baking stone, a cast-iron pan or heavy pizza tray will do.) Place an empty grill tray or baking pan on the rack underneath.
- When the loaf is ready to bake, slash the top with 1/4-inch-deep parallel cuts, using a very sharp knife or a serrated bread knife. This isn’t just for looks – it seems to bake better inside if you do this.
- Slide the loaf directly onto the hot stone or pan. (If using baking paper, leave it under the bread). Quickly pour a cup of hot tap water into the hot grill tray or baking pan and immediately shut the oven door. Bake for about 35 – 40 minutes, until lightly browned and firm. If you used baking paper, carefully remove it two-thirds of the way through the baking time and bake the loaf directly on the hot stone, cast-iron pan, or oven rack.
- Allow bread to cool on a rack before slicing.

Jo’s Note: Smaller or larger loaves will require adjustments in resting and baking time. If you like, you can make two loaves at a time, as they’re small enough to sit side by side in the oven.

Bon appétit !


I love Jo’s Gluten Free Artisan Bread, too, Hayley. Thanks for reading Why Is There Air!
Have made this bread and its great. I toast mine and spread it with coconut spread. Is delicious toasted. It’s heavier than a normal bread but has a great texture. I now have a containern ready to go in the fridge. If you eat a lot of bread then this may be the go, if not like me, then make a batch, cooks and freeze. The loaves are small, so great if you want a fresh batch each day. Thanks Jo, superb as always.
Thank you for the lovely review, Jane! Glad you like it 🙂 I’m just sitting here explaining how to go gluten free and dairy free to a young friend who needs some help, and I saw your blog post! 🙂 Must get her to try this one.
Jo x
You’re right, Nora, this gluten free artisan bread is quite flexible and very close to regular bread. Everyone can eaet and enjoy it! Thanks to Quirky Jo for her super recipe!
Wow, it actually looks like normal gluten bread unlike the usual gluten free fare. It’s good to see that Thermomix can help grind your own flour and help you to a healthier diet!